
How to bootstrap an edge Kubernetes Cluster using k0s with Cilium CNI & Ambient Istio Mesh
Kubernetes


Kubernetes can be bootstrapped in many many ways. In this guide, we focus on k0s, an open-source “zero friction”1 Kubernetes distribution that packages all necessary components into a single binary.
We will walk through creating a cluster using a k0s cluster config CRD and k0sctl, with custom configurations including the Cilium CNI (Container Network Interface), Ambient Mesh Istio service mesh, and making in highly available.

Introduction
Setting up a Kubernetes cluster from scratch can be complex and overwhelming, but tools like k0s simplify the process by providing sane defaults and an easy installation.
k0s2 is a lightweight Kubernetes distribution where the control plane and worker components run as processes managed by a single binary. This means you don't need to manually install container runtimes or systemd services for each component – k0s does it for you.
By default, k0s uses the Kube-router CNI (a fast, BGP-enabled networking provider), but it also supports other providers like Calico or custom CNIs.
We'll customize k0s to use Cilium as the networking provider and remove kube-proxy (leveraging Cilium’s eBPF dataplane instead). We'll also enable Istio Ambient Mesh for service mesh functionality without sidecar proxies, and set up high availability:
Keepalived will manage a floating Virtual IP (VIP) for the Kubernetes API, so if one controller fails, the VIP moves to another controller.
Envoy-based node-local load balancing ensures that on each worker node, an Envoy proxy load-balances traffic to the control plane. This makes internal cluster traffic to the API server resilient to controller outages.
Along the way, we will highlight the pros and cons of using k0s, and later compare it with kubeadm and MicroK8s on ease of setup, flexibility, and suitability for various environments.
What is k0s and why use it?
k0s is an all-inclusive Kubernetes distribution that aims to be as minimal and upstream-aligned as possible. All Kubernetes control plane components (API server, controller-manager, scheduler, etcd or other datastore) are bundled into one executable.
Key features of k0s include:
Single binary install: You run one static binary that contains everything – no OS-level package dependencies needed. This simplifies installation and upgrades (just replace the binary for a new version).
No container runtime needed on controllers: k0s runs control plane components as processes directly, without needing Docker or containerd on controller nodes. (Workers do use containerd by default for running pods.)
Flexible datastore options: k0s uses etcd by default for multi-node clusters, but via the Kine integration it also supports other backends (SQLite for single-node, MySQL, PostgreSQL, etc). This means a single-node dev cluster can run with a lightweight SQLite DB, while production clusters use a robust etcd automatically.
Built-in HA support: k0s can manage multiple control plane nodes. It provides features like control plane load balancing (CPLB) and node-local load balancing (NLLB) to improve availability without external dependencies.
Defaults and extensibility: By default it comes with Kube-router CNI (or Calico) and other essentials (kube-proxy, CoreDNS, etc), but you can override these to use custom solutions (as we'll do with Cilium and Istio).

Why use k0s? For beginners, k0s offers a quick start with minimal moving parts, while still allowing advanced customizations. It’s great for both local clusters (you can spin up a single-node k0s cluster in minutes) and production (multi-node with HA). The k0sctl tool further simplifies multi-node setup by handling SSH and deployment steps declaratively.
Preparing the k0s Cluster Configuration (CRD)
k0s clusters can be defined in a YAML config file (referred to here as a Cluster CRD because it uses a Kubernetes-style API and kind). We'll create a config that includes all the custom settings we need. Below is a sample k0scluster.yaml:
apiVersion: k0sctl.k0sproject.io/v1beta1
kind: Cluster
metadata:
  name: k0s
  user: admin
spec:
  hosts:
  - ssh:
      address: vm01.maas
      user: k0s
      port: 22
      keyPath: ~/.ssh/id_rsa
    role: controller+worker
    noTaints: true
  # ... same for vm02 to vm06 ...
  k0s:
    config:
      apiVersion: k0s.k0sproject.io/v1beta1
      kind: Cluster
      metadata:
        name: k0s
      spec:
        api:
          sans:
            - 192.168.111.10
            - k8s.slys.dev
            - k8s.maas
            - vm01.maas
            - vm02.maas
            - vm03.maas
            - vm04.maas
            - vm05.maas
            - vm06.maas
        network:
          provider: custom
          kubeProxy:
            disabled: true
          nodeLocalLoadBalancing:
            enabled: true
            type: EnvoyProxy
          controlPlaneLoadBalancing:
            enabled: true
            type: Keepalived
            keepalived:
              vrrpInstances:
                - virtualIPs: ["192.168.111.10/24"]
                  authPass: "7e205ace"
        storage:
          etcd:
            peerAddress: 192.168.111.10
          type: etcd
        telemetry:
          enabled: false
Let’s break down the important parts of this configuration:
Network Provider (
spec.network.provider: custom): By default, k0s would install its built-in CNI (Kube-router or Calico) for networking. We set this tocustomto tell k0s not to install any default CNI. This allows us to deploy Cilium manually as our CNI. (If we wanted Calico via k0s, we could setprovider: calicowith optional Calico settings, but here we choose custom for full control.)Disable kube-proxy (
spec.network.kubeProxy.disabled: true): We turn off kube-proxy, the default service load balancer in Kubernetes. Why? Because Cilium can operate in “kube-proxy replacement” mode using eBPF for handling Service networking. Disabling kube-proxy prevents conflicts and unnecessary overhead, since Cilium will take over service load-balancing. (Note: If you weren't using Cilium’s kube-proxy replacement, you would leave this enabled. But in our case, we want kube-proxy out of the way.)Node-Local Load Balancing (NLLB) with Envoy: The section
nodeLocalLoadBalancing.enabled: truewithtype: EnvoyProxyinstructs k0s to run an Envoy proxy on each worker node that load balances traffic to the control plane. Essentially, the k0s worker process will launch Envoy listening on the local loopback, so that any system component (like kubelet or CoreDNS) calling the API server will connect to this local Envoy, which in turn distributes the request to one of the healthy controller nodes. This improves resiliency: if a controller goes down, the Envoy on workers will automatically stop sending traffic to it, using other controllers instead. (Note that NLLB is for internal traffic – it makes the cluster’s control plane calls HA from the perspective of nodes, but it doesn't by itself provide an external IP for kubectl access. That’s where the next feature comes in.)Control Plane Load Balancing (CPLB) with Keepalived: Enabling
controlPlaneLoadBalancingwithtype: Keepalivedsets up a virtual IP for the Kubernetes API server that floats between control plane nodes using VRRP. In our example, we chose192.168.56.100/24as the VIP. All controller nodes will run Keepalived, and one of them will hold the VIP at a time. If that node dies, the VIP moves to another controller automatically. Keepalivedensures the VIP is highly available, and k0s will also handle routing API traffic on the node that has the VIP to all controller instances. By default (in k0s v1.32+), the actual load-balancing of API requests is done via a lightweight userspace proxy inside the k0s controller process. This avoids complexity of IPVS, but you can opt for Keepalived's IPVS mode if needed for performance. For most cases, the default is fine. The main takeaway: with this enabled, you (and any external clients) can use the VIP (192.168.111.10in this case) as the single API server endpoint, instead of tying to a specific node’s IP.Hosts and Roles: Under
spec.hosts, we list the machines in our cluster and assign roles. In this example, we have two controllers and one worker. For each, we provide SSH connection info (address, user, key). k0sctl will use this to SSH in and set up k0s. You can have more workers, and typically at least 2 or 3 controllers for a robust HA setup. Ensure your hosts are up and accessible via SSH, and ideally have passwordless SSH set up with the given key.No taints: Allows workload scheduling on all nodes - useful in smaller environments or edge deployments.
With this configuration, we’ve defined a cluster that has HA at the control-plane level (six controllers with a VIP and internal load-balancing) and will use Cilium for networking (since we set provider: custom, k0s will not install any CNI itself). We also turned off kube-proxy because Cilium will handle that functionality.
Before applying this, let's double-check prerequisites: k0sctl installed locally, and the target nodes (controllers/workers) are clean (no existing Kubernetes) and have basic requirements (64-bit Linux, kernel with required modules for Kubernetes, etc.). k0s will handle installing necessary components like containerd on the nodes, so you don't need to pre-install a container runtime.
Bootstrapping the cluster with k0sctl
Now that our cluster config file (k0scluster.yaml) is ready, we can bootstrap the cluster using k0sctl. k0sctl is a CLI tool that reads the cluster config and automates the setup over SSH.
Apply the cluster config: Run the apply command with our config file:
k0sctl apply --config k0scluster.yamlGet the kubeconfig: Once
k0sctl applyfinishes, retrieve the kubeconfig to manage the cluster. k0sctl can output the kubeconfig for you:
k0sctl kubeconfig --config k0scluster.yaml > kubeconfig_k0s.yaml
export KUBECONFIG=$PWD/kubeconfig_k0s.yaml
Verify the cluster is up: Try running
kubectl get nodesto see if both your controllers and worker show up as Ready. You should see the hostnames/IPs with their roles. Also checkkubectl -n kube-system get pods– at this point, you will likely see CoreDNS pods and perhaps some k0s-specific pods (like metrics or proxy pods if any). What you won’t see yet is any CNI pods (since we haven’t installed Cilium yet) – and note that CoreDNS may not be fully running until networking is in place. That’s expected, because we still need to install Cilium to provide pod networking.
Installing Cilium CNI
Cilium3 is a powerful CNI that uses eBPF in the Linux kernel to implement networking, load balancing, and security. We chose Cilium to leverage advanced features and to run Kubernetes without kube-proxy. Now we’ll install Cilium on the cluster.
Install Cilium CLI
The easiest way to install Cilium is via the Cilium CLI. If you don’t have it, install the CLI on your machine (not on the cluster nodes). You can download it from the Cilium GitHub releases. For example, on Linux:
export CILIUM_CLI_VERSION=$(curl -s https://raw.githubusercontent.com/cilium/cilium-cli/main/stable.txt)
curl -L --fail --remote-name-all https://github.com/cilium/cilium-cli/releases/download/${CILIUM_CLI_VERSION}/cilium-linux-amd64.tar.gz{,.sha256sum}
sha256sum -c cilium-linux-amd64.tar.gz.sha256sum  # verify checksum
sudo tar xzvf cilium-linux-amd64.tar.gz -C /usr/local/bin
This downloads and installs the cilium CLI tool (you can also use Homebrew or other methods). Verify by running cilium version.
Install Cilium on the cluster
With the CLI ready and kubeconfig pointing to our cluster, run the installation command:
cilium installBy default, this will install the latest stable version of Cilium. Since we disabled kube-proxy on the cluster, the Cilium installer should detect that and enable kube-proxy replacement automatically. (If you want to be explicit, you can add --set kubeProxyReplacement=strict to ensure Cilium takes over all Service LB functions.) The installer will create the Cilium agent DaemonSet and deploy the Cilium Operator.
If all goes well, you'll see output indicating success, e.g. "✅ Cilium was installed successfully". The Cilium docs provide an example of a successful install and status check:
cilium status --waitThis will show the status of Cilium components (agents and operator). For example:
DaemonSet         cilium             Desired: 1, Ready: 1/1, Available: 1/1
Deployment        cilium-operator    Desired: 1, Ready: 1/1, Available: 1/1
Containers:       cilium             Running: 1
                  cilium-operator    Running: 1
At this point, our cluster has networking! Cilium handles networking between pods and also implements Services without kube-proxy. We can verify basic connectivity with:
cilium connectivity testThis runs a suite of connectivity checks (deploying test pods temporarily) and should report all tests successful. The Cilium docs show an example test report with dozens of tests passing.
Now if you re-check kubectl -n kube-system get pods, you should see the cilium-* pods in Running state. CoreDNS should also now be Running (since it can connect to kube-api and to pods). You have a fully functional Kubernetes cluster with Cilium CNI.
Enabling Ambient Mesh with Istio
Service meshes add powerful features for inter-service communication (like observability, traffic shifting, encryption). Istio4 is a popular service mesh, and it recently introduced Ambient Mesh mode which dispenses with the typical sidecar proxies. In sidecar-based meshes, every pod gets an Envoy sidecar, which incurs overhead. Ambient Mesh moves to a sidecar-less model: it uses ztunnel (a per-node proxy) and waypoint proxies (one per service or namespace for L7 features) to provide mesh capabilities. This can greatly reduce overhead and complexity of managing sidecar injections.
We will set up Istio Ambient Mesh in our cluster to demonstrate its use.
Install Istio (ambient profile)
First, install the Istio CLI (istioctl) on your machine if you don’t have it. Then, use it to install Istio with ambient mode enabled5. The Istio project provides a special installation profile for ambient:
# Download Istio release (if not already downloaded)
curl -L https://istio.io/downloadIstio | sh -  # downloads the latest Istio release
cd istio-1.**/  # cd into the extracted Istio package directory
export PATH=$PWD/bin:$PATH  # add istioctl to PATH

# Install Istio with ambient profile
istioctl install --set profile=ambient --skip-confirmation
This will install Istio’s control plane components on the cluster. The ambient profile includes Istiod (Istio’s control plane), the Istio CNI, and sets up the ztunnel daemonset. After a successful install, you should see output like:
✔ Istio core installed
✔ Istiod installed
✔ CNI installed
✔ Ztunnel installed
✔ Installation complete
Istio is now running, but by default it won't affect any workloads until we tell it which ones to manage.
Enable Ambient Mesh for a namespace
In Istio ambient, workloads opt-in to the mesh by labeling their namespace (or individual pods) with a special label. To enable ambient mesh for the default namespace (for example), run:
kubectl label namespace default istio.io/dataplane-mode=ambientThis label signals Istio to include pods in that namespace into the ambient mesh. With this, the ztunnel running on each node will start capturing traffic to/from pods in default and route it through the mesh’s secure overlay. Your application pods do not need any sidecar; the ztunnel (an Envoy under the hood) on each node acts as a L4 proxy for all ambient pods on that node.
If you deploy a sample app in the default namespace now, you should see that it can communicate with other ambient-enabled pods through mTLS by default. The Istio documentation suggests installing Gateway API CRDs as well (since ambient uses the Kubernetes Gateway API for higher-layer traffic management). You can do that with:
kubectl apply -f https://github.com/kubernetes-sigs/gateway-api/releases/download/v1.3.0/standard-install.yaml(This installs the Gateway API CRDs needed if you plan to add HTTP routing with waypoints.)
At this point, we have Istio Ambient Mesh running:
The ztunnel daemonset will ensure one
ztunnelpod runs on each node (checkkubectl get pods -n istio-systemto see them). Ztunnel handles L4 connectivity and mTLS for ambient pods.We haven't deployed any waypoint proxies yet, which are optional for L7 traffic management. If your use-case needs layer-7 (HTTP routing, etc.), you would deploy a waypoint proxy for the service or namespace. For a basic setup, we can skip waypoints.
Pros and cons of using k0s for cluster setup
Now that we've built a Kubernetes cluster with k0s, let's reflect on the advantages and disadvantages of this approach, especially in contrast to other methods:
Pros of k0s
Easy, Single-Binary Install: k0s’s tagline "zero friction" is warranted – everything is in one binary and one config. It requires no dependencies on the host (no need to pre-install Docker, kubeadm, etc.). This reduces setup time and potential OS compatibility issues.
Built-in High Availability Features: k0s includes solutions for control plane HA (CPLB with VIPs) and internal load-balancing (NLLB) out of the box. As we saw, enabling a virtual IP with Keepalived was as simple as a few lines in the config, and k0s handled deploying Keepalived and coordinating it across controllers. Similarly, node-local Envoy load balancers were enabled with a toggle. These features provide a highly available control plane without external load balancers, which is great for on-prem or lab setups.
Flexible Configuration: Through the cluster config, we could customize a lot: choose the CNI, turn off kube-proxy, tweak networking CIDRs, etc. k0s doesn't lock you into its defaults – you can bring your own components (as demonstrated with Cilium and Istio). It supports standard Kubernetes APIs and CRDs once running, so any cloud-native addon (Ingress controllers, storage drivers, etc.) should work fine. Also, k0s’s use of Kine means you can even configure external SQL databases for the control plane storage if needed (though etcd is the usual choice for multi-node).
Upstream Kubernetes Conformance: k0s aims to be a “vanilla” distribution. You get a fully conformant Kubernetes cluster (passing conformance tests). This means your skills and tools remain applicable – kubectl, helm, etc. all work normally. There's no weird proprietary API. Even the default choices like Kube-router CNI are upstream projects.
Lightweight footprint: k0s’s default components (like Kube-router for networking) are efficient. It runs control plane processes directly which can save some overhead of running them in containers. Many users find k0s (and similar distros like k3s) to use fewer resources than a comparable kubeadm setup. This makes it good for edge or IoT, similar to MicroK8s or k3s.
k0sctl for automation: The k0sctl tool makes repeatable cluster setups easy – infrastructure-as-code style. The config YAML is quite readable and can be version-controlled. It’s easier than manually SSHing into nodes to init or join them (like you might with kubeadm).
Cons & trade-offs of k0s
Smaller Community & Ecosystem: k0s is newer and less prevalent than kubeadm or k3s. This means fewer community scripts, blogs, or forum Q&As if you run into issues (though it's gaining adoption). Official docs are good, but you might not find as many third-party resources.
Opinionated Defaults: While flexible, k0s does come with certain opinions. For example, it defaults to not running workloads on controllers (no kubelet on controller by default). This is good for production isolation, but in a small lab you might want to use controller as worker too – which requires additional config or flags (
k0s controller --enable-worker). Also, the default networking (Kube-router) might be unfamiliar to those used to Flannel or Calico (though we showed how to change it). In short, be ready to learn k0s’s defaults or override them.GUI / Addons: k0s by itself doesn’t provide a fancy GUI or easy addon enabler. By contrast, MicroK8s has a built-in addon system, and some Kubernetes installers have dashboard UIs. With k0s, you’ll set up things via YAML and kubectl/Helm as needed (which is typical in Kubernetes, but newbies might miss one-command addons like “microk8s enable dashboard”). That said, you can manually install anything you want (we installed Istio via its CLI, for instance).
No Cloud Provider Integration out-of-box: k0s doesn’t include cloud-controller-managers or storage provisioners for cloud platforms. If you run on bare metal or generic VMs, this is fine. But on a cloud, you’d need to manually deploy the appropriate cloud provider integration if you want things like LoadBalancer Services or dynamic volumes. (This is similar to kubeadm though – not a unique drawback to k0s, just something to note for production on cloud.)
Upgrades need coordination: As with any Kubernetes cluster, upgrading can be non-trivial. k0s does simplify the process (just upgrade the binary and do
k0s upgradesteps, or use k0sctl to upgrade all nodes). However, it’s not managed for you (unless you use Mirantis’s managed offering). In comparison, a managed Kubernetes (GKE/EKS or K3s with rancher) might handle upgrades more seamlessly. This is a minor point, but worth planning for in production.

Comparing k0s with kubeadm and MicroK8s
To put things in perspective, let's compare k0s, kubeadm, and MicroK8s on some key aspects:
Overview of each tool
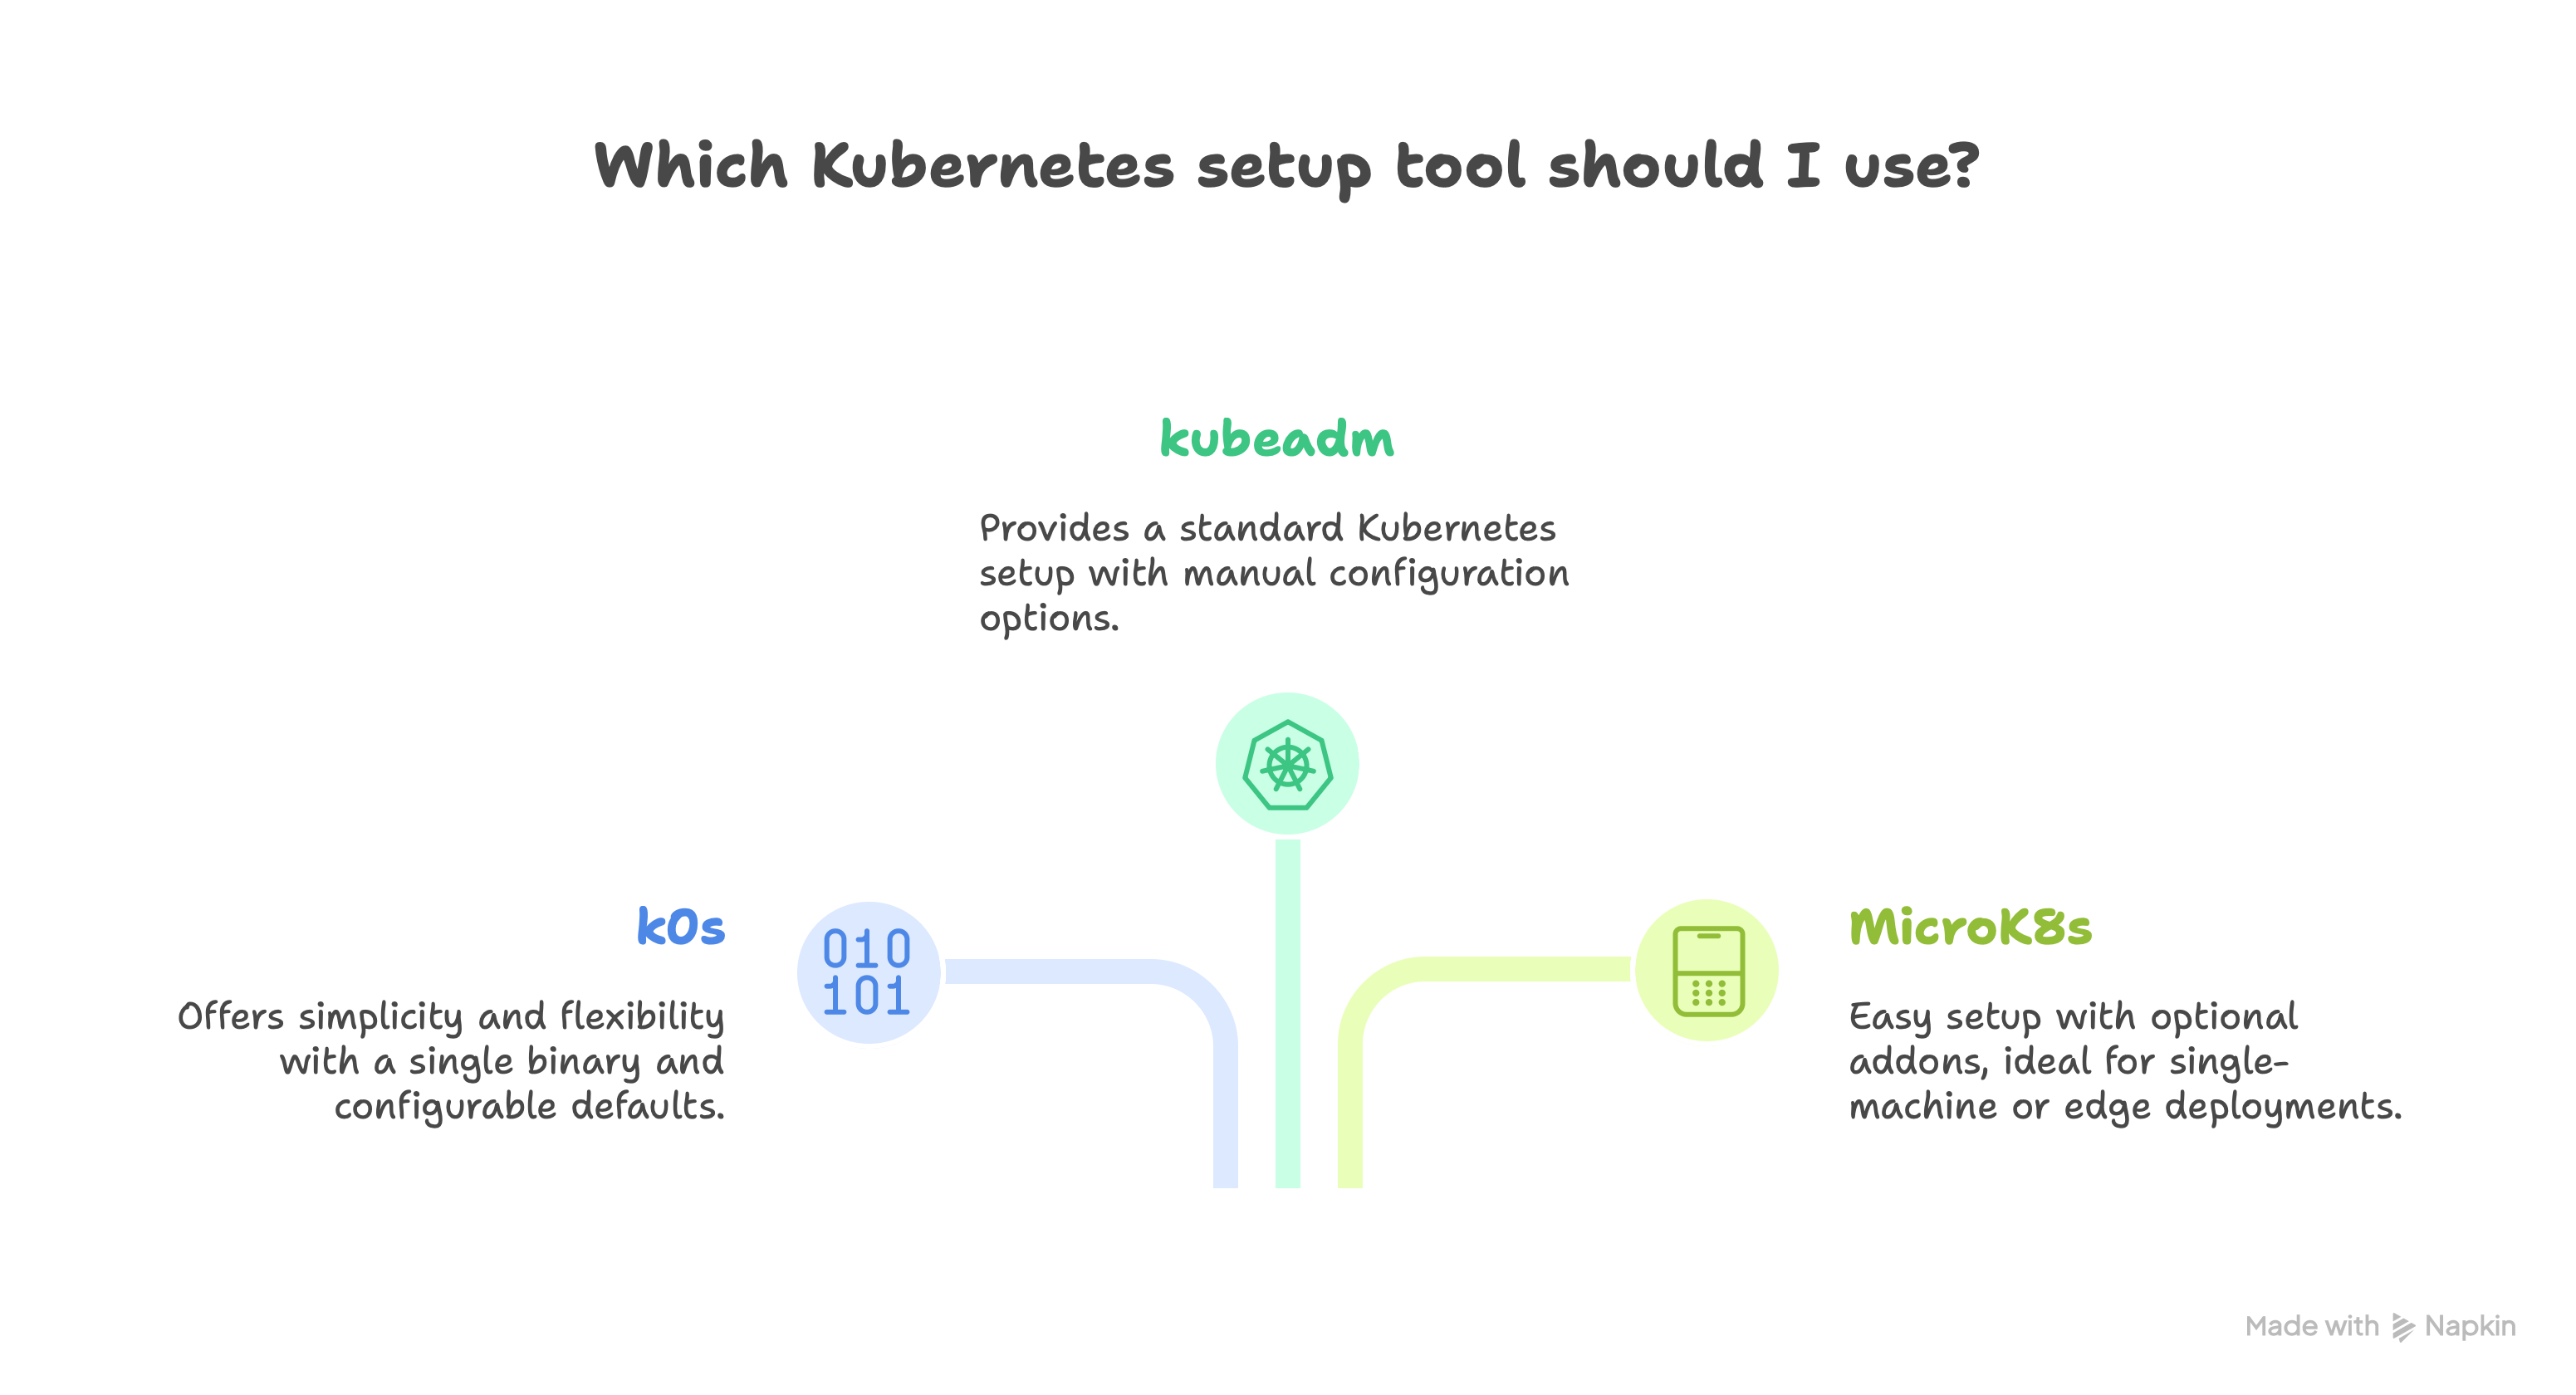
k0s: A Kubernetes distribution (not just an installer) – single binary, with its own defaults (Kube-router networking, etcd/SQLite datastore, etc) but highly configurable. Aimed at simplicity and flexibility for both dev and production.
kubeadm: Not a distribution, but an official toolkit to install a standard Kubernetes cluster. It sets up the control plane on your nodes and then you install a CNI and any other addons you want. kubeadm is basically doing the Kubernetes setup tasks that a human would otherwise do manually (certs, manifests, etc). It's the upstream recommended way to create clusters on your own infrastructure.
MicroK8s6: A lightweight, self-contained Kubernetes packaged by Canonical (Ubuntu) as a snap. It’s designed for easy setup on a single machine (though it can cluster multiple nodes too). It includes a lot of optional addons (DNS, Ingress, Istio, etc) that can be enabled with a simple command. Think of it like an all-in-one Kubernetes appliance for developers or edge deployments.
Ease of setup
k0s: Very easy, especially with k0sctl. A minimal config can bring up a multi-node cluster in one step. No separate installation of dependencies needed – just push the k0s binary and go. It automates certificate generation, etcd clustering, etc. For a single node, it’s literally k0s install controller --single (for example) and you have a cluster. For multi-node, k0sctl makes it straightforward.
kubeadm: Moderate difficulty. You need to prepare each node (install container runtime, kubeadm, kubelet, set up networking prerequisites). Then run kubeadm init on master, then kubeadm join on workers with the token. You also must install a CNI plugin afterwards (until then, pods can’t network). There are quite a few manual steps, and for HA, you have to set up an external load balancer or keepalived manually, and use the --control-plane-endpoint flag during init. On the plus side, kubeadm is well-documented and widely used, but for a newbie it’s more to juggle compared to k0s or MicroK8s.
MicroK8s: Easiest for single-node. On Ubuntu, it’s literally snap install microk8s --classic and you’re done – you have a running Kubernetes with DNS and networking. It comes configured with sensible defaults (Calico for networking, CoreDNS, etc) and you can enable extras via microk8s enable <addon>. To add another node, MicroK8s provides a microk8s add-node command to get a join token, and microk8s join on the new node. This is simpler than kubeadm’s process (no separate config needed), but it’s less commonly done; MicroK8s is primarily used for single-node or small clusters.
Flexibility and customization
k0s: High flexibility. The k0s config file allows customizing the networking (choose built-in Calico or bring your own CNI as we did), switching datastore (etcd vs external databases), tuning component settings, etc. Because k0s results in a fairly standard Kubernetes environment, you can later customize it just like any cluster (installing Helm charts, etc.). You are not limited to what k0s ships – e.g., we disabled some components (kube-proxy) and added others (Istio) easily. One limitation to note: k0s’s design (no kubelet on controller by default) means by default you can’t schedule pods on masters; if you need that (for small clusters), you have to enable the controller as a worker (taint removal or a flag to run kubelet). But that’s a minor tweak. Overall, k0s is quite flexible for different use cases.
kubeadm: Ultimate flexibility, since it’s basically DIY Kubernetes. You choose everything: which versions of components (by specifying kubeadm config or using different kubeadm builds), which network plugin (apply any manifest you want), which add-ons (nothing is installed unless you do it). You can configure kubeadm with a config file for things like API server extra flags, cluster name, etc., but it doesn’t impose any long-term structure – after using it, you just have Kubernetes. So you can alter anything as you would on any cluster. If something can be done in Kubernetes, you can do it with kubeadm (because it’s just upstream Kubernetes it sets up). The downside is this flexibility means nothing is pre-integrated for you. For example, k0s integrated Keepalived for HA; with kubeadm, you integrate your own HA (like setting up an HAProxy or keepalived manually). Flexibility comes at the cost of more manual work.
MicroK8s: Medium flexibility. MicroK8s comes with pre-packaged components (like a specific version of Calico, or using dqlite for HA datastore). It offers a set of official addons which cover many needs (ingress, metallb, metrics, etc.), but if you want something done in a way the addons don’t support, you might find it tricky. For instance, switching the CNI in MicroK8s is not a one-line change – it’s possible (since you can disable the default and apply a new one) but not as straightforward as k0s. MicroK8s is somewhat tuned for simplicity over flexibility – e.g., in HA mode it uses its built-in dqlite datastore (you can’t opt for etcd). It’s flexible in the sense that it’s still a Kubernetes cluster – you can kubectl apply any manifest – but the lifecycle and packaging are tightly controlled by the snap system. Advanced customizations (like customizing the API server flags) are possible via editing MicroK8s config files, but it’s not as openly documented as k0s or kubeadm’s methods.
Suitability for production vs. local development
k0s: Suitable for both, with a tilt towards production readiness. It supports multi-master HA with etcd, and we have seen it can integrate with production-grade components (Cilium, Istio, etc.). k0s is used by some in production environments (Mirantis, the sponsor, positions it for that). Thanks to features like managed etcd lifecycle and easy HA, it’s a good choice for on-prem clusters. For local dev, k0s is also fine: you can run k0s controller --single on your laptop or in a VM and get a quick cluster. It might not be as one-command as MicroK8s or kind, but it’s quite straightforward. So k0s spans dev and prod use cases well. One could develop on a single-node k0s and later deploy a multi-node k0s cluster in prod with the same config style.
kubeadm: Geared more towards production (or at least “real” clusters), not so much for quick local dev. kubeadm assumes you have real or virtual machines to set up. It’s the go-to for production DIY clusters because it produces standard clusters that ops teams can manage long-term. But for a beginner just wanting a local cluster, kubeadm would be a bit heavy – you’d be better off using kind, minikube, or MicroK8s in that case. In cloud environments or large on-prem, kubeadm is a solid production tool (e.g., lots of docs on HA clusters with kubeadm, how to upgrade them, etc.). But it lacks dev convenience features – it’s not meant for laptop use (though you could run all components on one VM with some effort).
MicroK8s: Very much aimed at local development, QA, or edge scenarios. Its strength is how easy it is to install and get going on a single machine, which is great for developers or CI pipelines. For production, MicroK8s can be used especially in edge or small-scale clusters. Canonical has an HA mode (forming a cluster of e.g. 3 MicroK8s nodes using dqlite). This can work for certain use cases, but etcd is generally more battle-tested for larger clusters. Also, MicroK8s is heavily tied to Ubuntu environments (since it’s a snap, it runs on Ubuntu or other snap-supported Linux). Using it in production might be fine if you’re an Ubuntu shop and your scale is modest. However, in large enterprises, kubeadm or managed Kubernetes is more common. So, MicroK8s is superb for development and testing, and also for small deployments or edge computing nodes. For large-scale production, it’s less common (though not impossible).
To crystallize the comparison, here’s a quick comparison table of key points:
Conclusion
In this post, we demonstrated how to bootstrap a Kubernetes cluster using k0s with a custom configuration. We set up a highly available control plane with Keepalived VIP and Envoy-based node-local load balancing, swapped out the default networking for Cilium CNI (fully replacing kube-proxy with eBPF), and enabled the cutting-edge Ambient Mesh mode of Istio for a sidecar-less service mesh. Each part of the k0s cluster CRD was explained, and we walked through the commands to bring it all up (using k0sctl, cilium CLI, istioctl, etc.).
For newcomers to Kubernetes operations, this approach shows that you don't have to manually wire everything together – k0s provided a lot of the heavy lifting (HA setup, base Kubernetes install), and we could layer additional technologies on top smoothly. The pros of k0s include its simplicity and flexibility, making it a solid choice for both learning and real deployments. We also compared it with kubeadm and MicroK8s to give you a sense of where k0s stands: it offers a middle path that is easier than kubeadm but more customizable than MicroK8s in many respects.
As you proceed with your Kubernetes journey, you may choose different tools for different scenarios. If you need a quick sandbox, MicroK8s or Kind might be handy. For a production cluster on your own servers, kubeadm or k0s are excellent choices – with k0s shining when you want an integrated solution and kubeadm when you want fine-grained control. The good news is, all these paths lead to Kubernetes, and the skills you pick up (manifest management, CNI plugins, service mesh usage) are transferable.
Happy clustering with k0s! 🚀